> ## Documentation Index
> Fetch the complete documentation index at: https://docs.facebetter.net/llms.txt
> Use this file to discover all available pages before exploring further.
# Sign in and add the filter
> Sign in to Facebetter and add the beauty filter to an OBS source.
[Install on macOS](/obs/install) or [install on Windows](/obs/install-windows) first, then sign in and attach the filter to a source.
Sign-in, adding the filter, and adjusting effects work the same on macOS and Windows. The screenshots below are English OBS on a Mac.
## Sign in
After OBS opens, the Facebetter panel sits on the right. If you do not see it, use **Tools → Facebetter**. The panel can stay docked next to the audio mixer.
Before you sign in, the middle of the panel is the sign-in page.
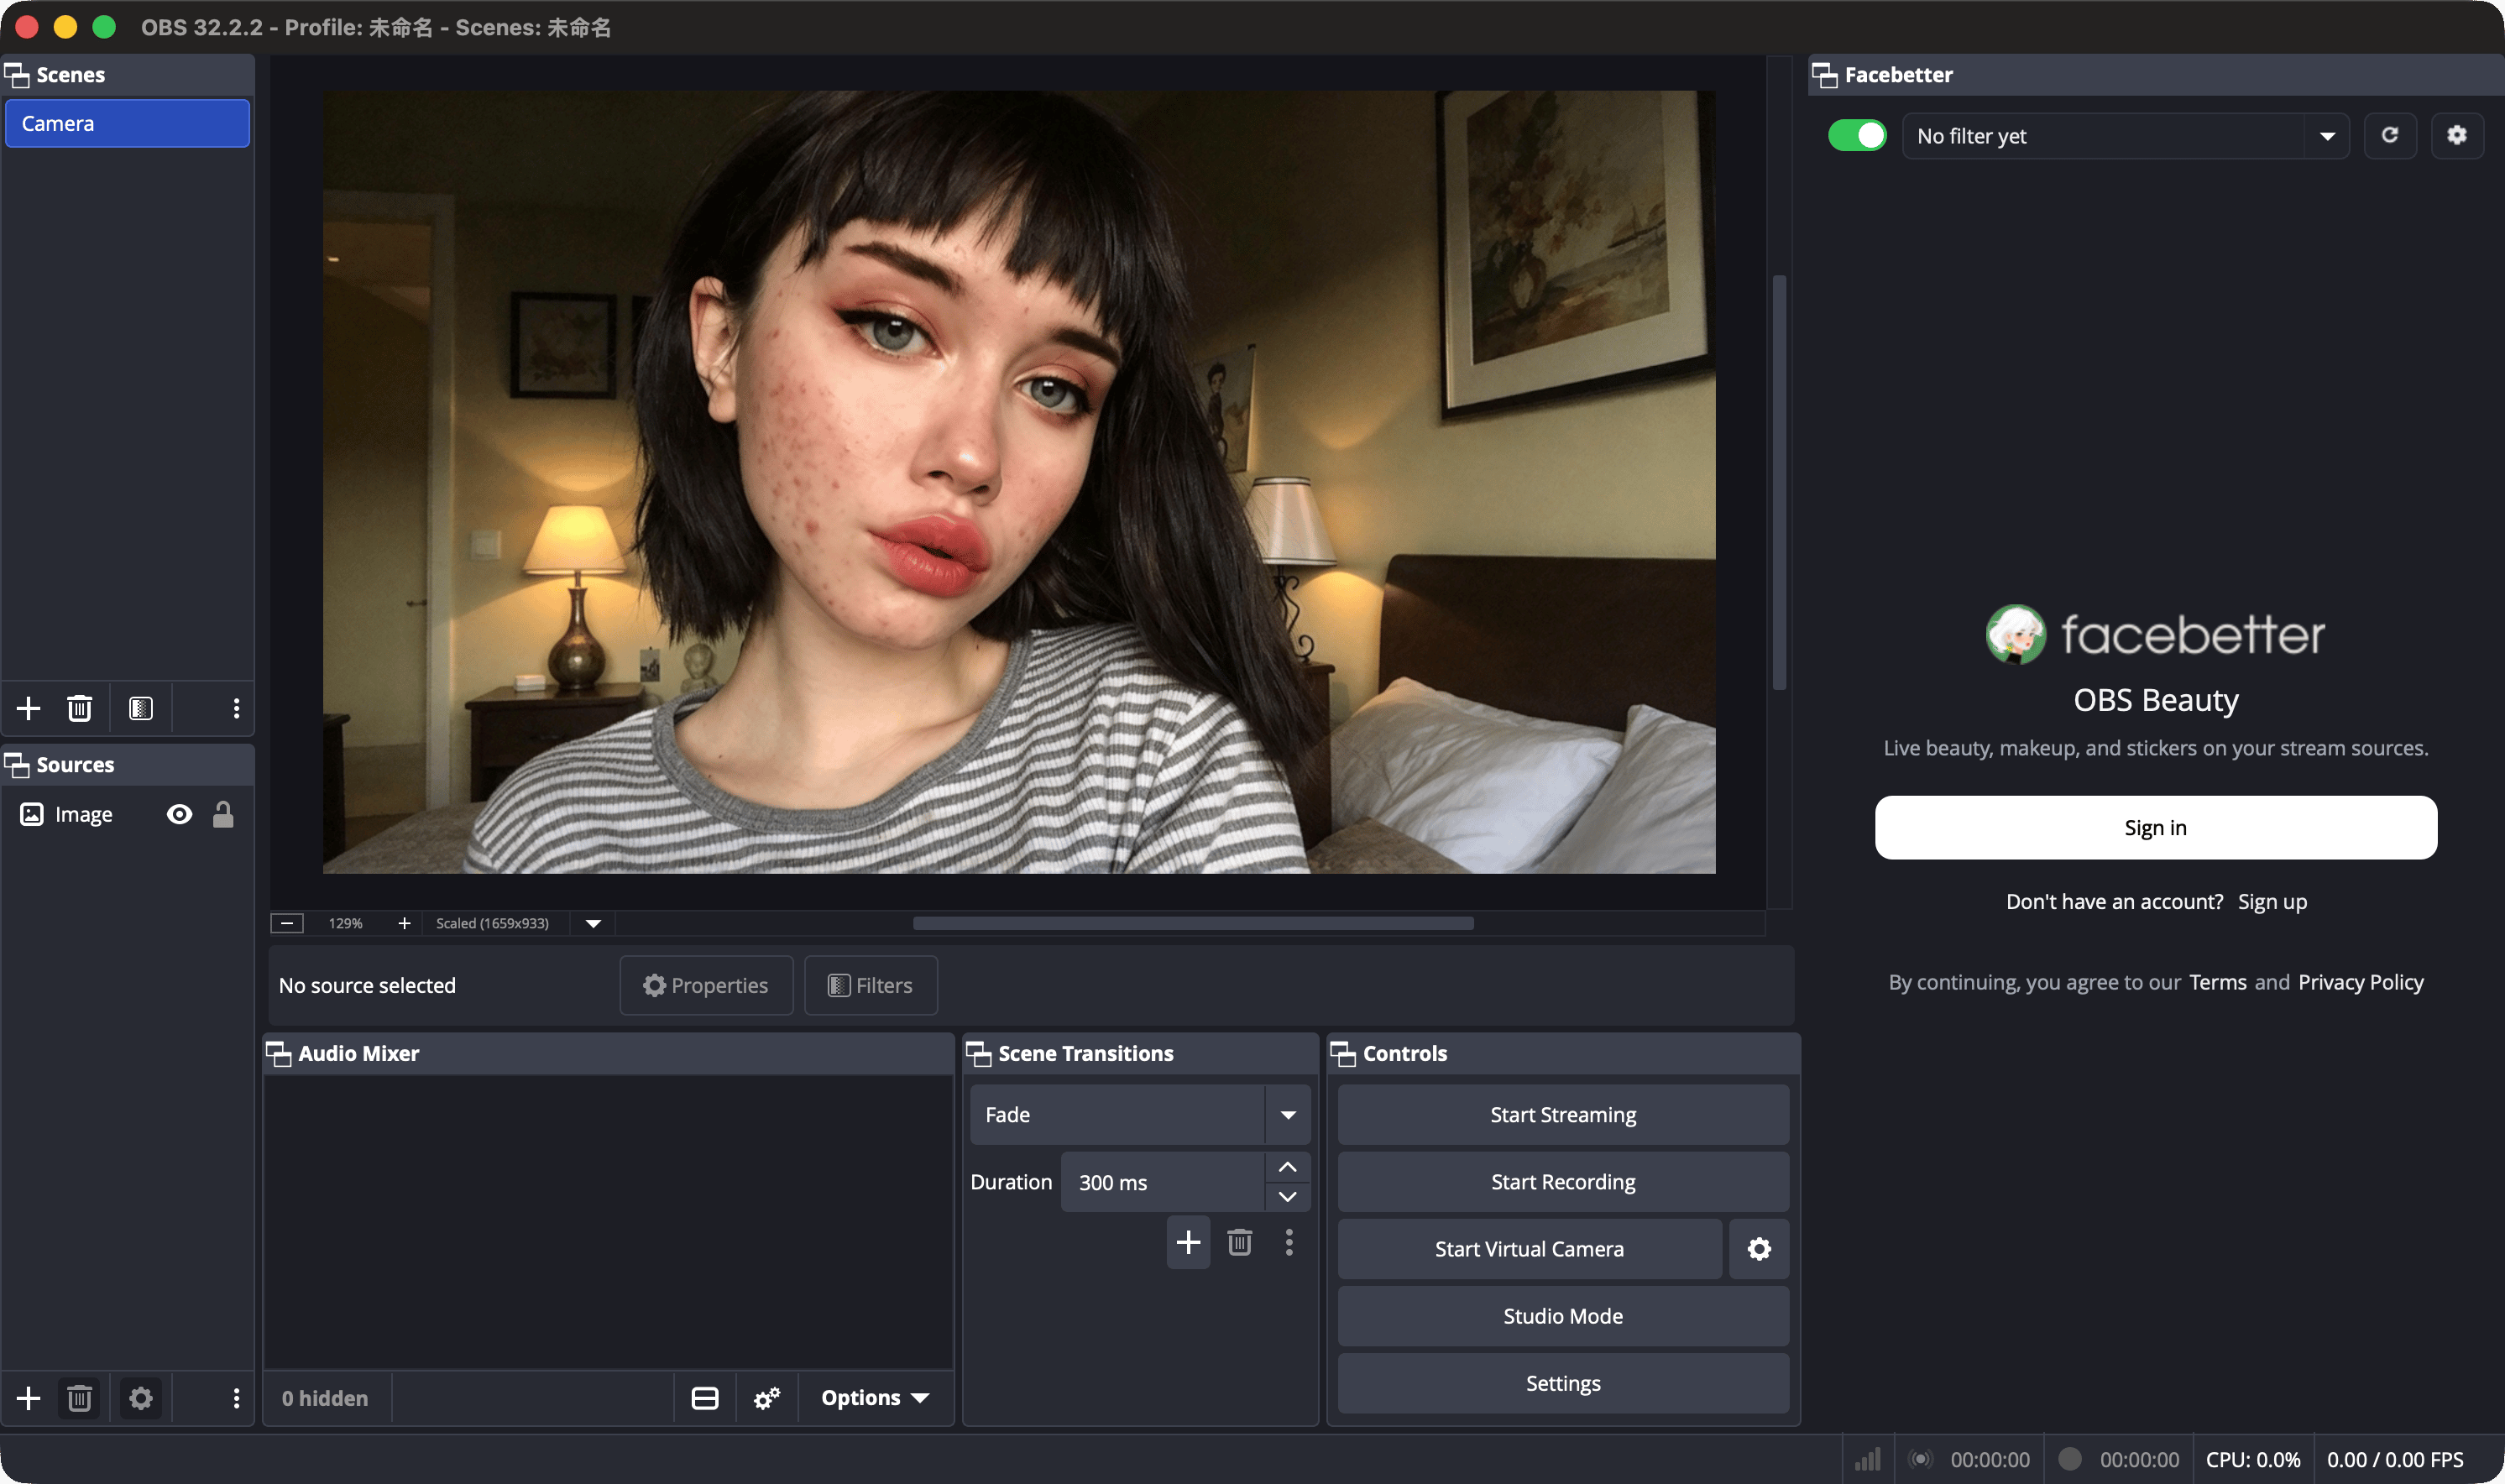 1. Click **Sign in**. If you do not have an account, click **Sign up** underneath.
2. The system browser opens the Facebetter authorization page. If you are already signed in on the website, the page shows that account and does not ask for the password again.
3. Click **Authorize OBS**. To use another account, click **Use a different account**.
1. Click **Sign in**. If you do not have an account, click **Sign up** underneath.
2. The system browser opens the Facebetter authorization page. If you are already signed in on the website, the page shows that account and does not ask for the password again.
3. Click **Authorize OBS**. To use another account, click **Use a different account**.
 When authorization finishes, return to OBS. The free plan includes every effect. Output carries a `facebetter.net` watermark.
## Add the filter to a source
Signing in does not beautify the picture. If the top of the panel says **No filter yet**, the sliders stay locked. Add the filter to a source first.
The source does not have to be a camera. An image, a video, or a media source works the same way.
### Open Filters for that source
In the Sources list, right-click the item you want to process and choose **Filters**.
When authorization finishes, return to OBS. The free plan includes every effect. Output carries a `facebetter.net` watermark.
## Add the filter to a source
Signing in does not beautify the picture. If the top of the panel says **No filter yet**, the sliders stay locked. Add the filter to a source first.
The source does not have to be a camera. An image, a video, or a media source works the same way.
### Open Filters for that source
In the Sources list, right-click the item you want to process and choose **Filters**.
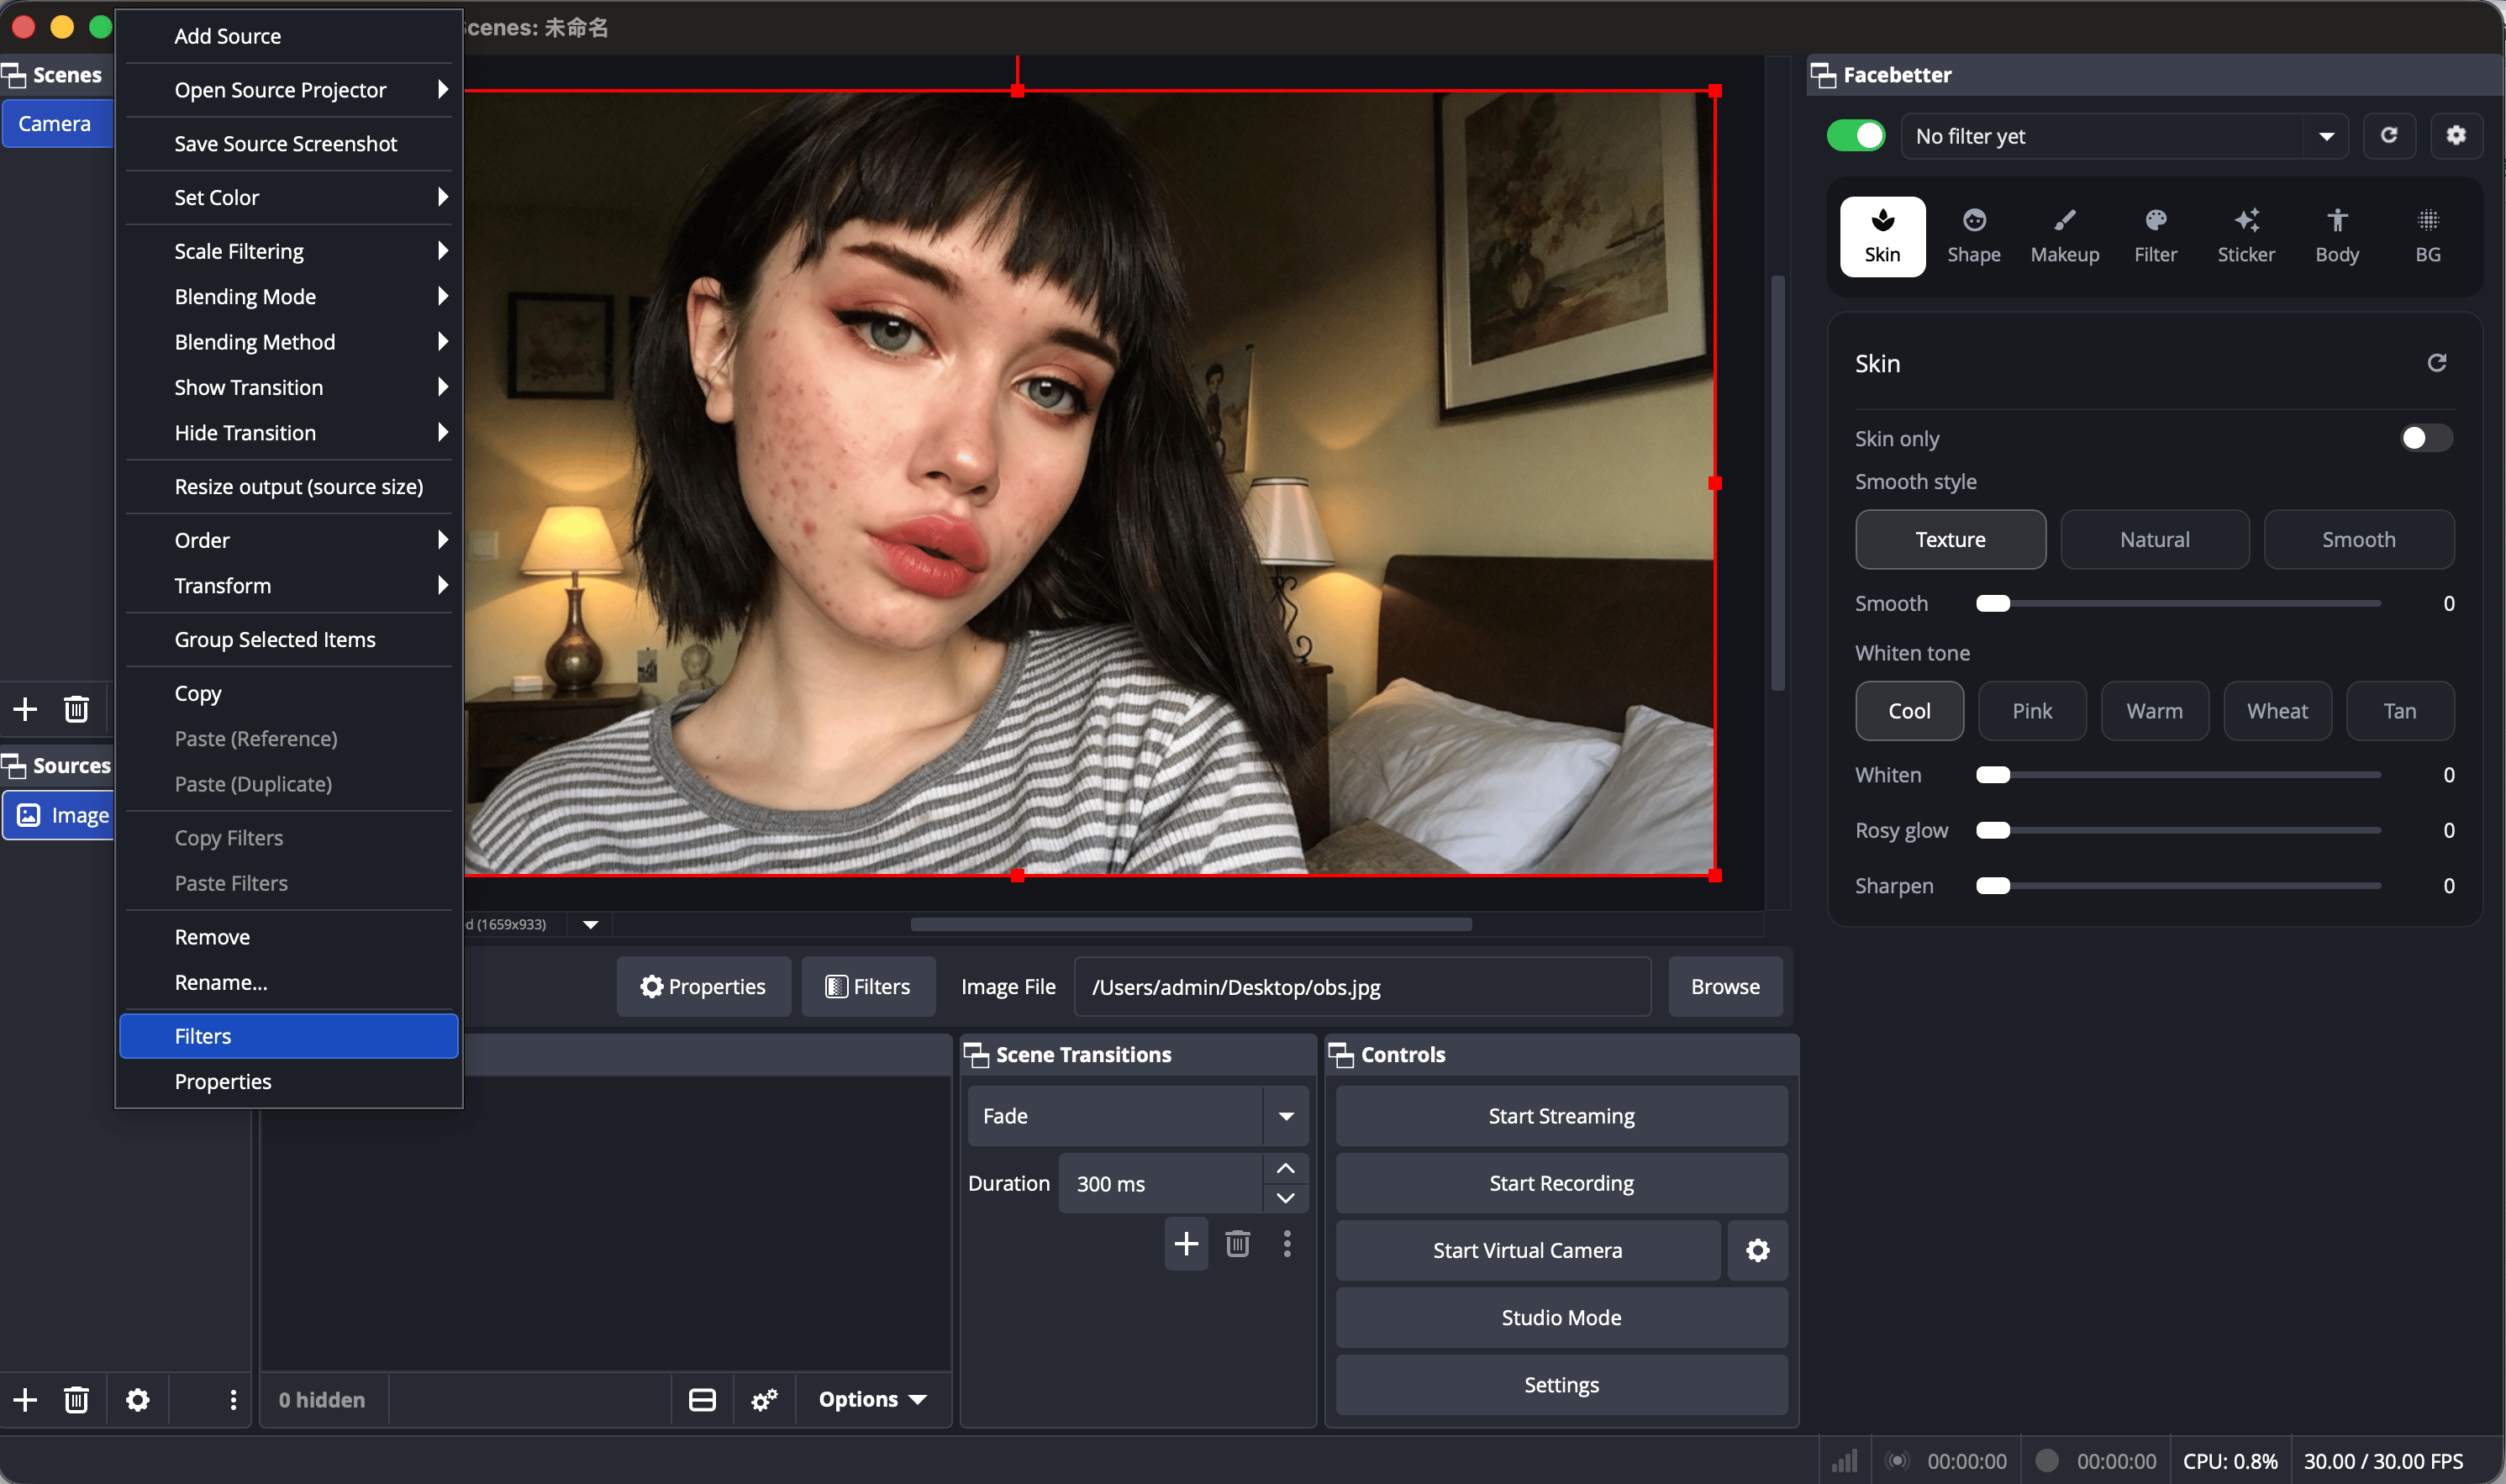 There is also a **Filters** button under the Sources list. Select the source, then click that button.
### Add Facebetter Beauty
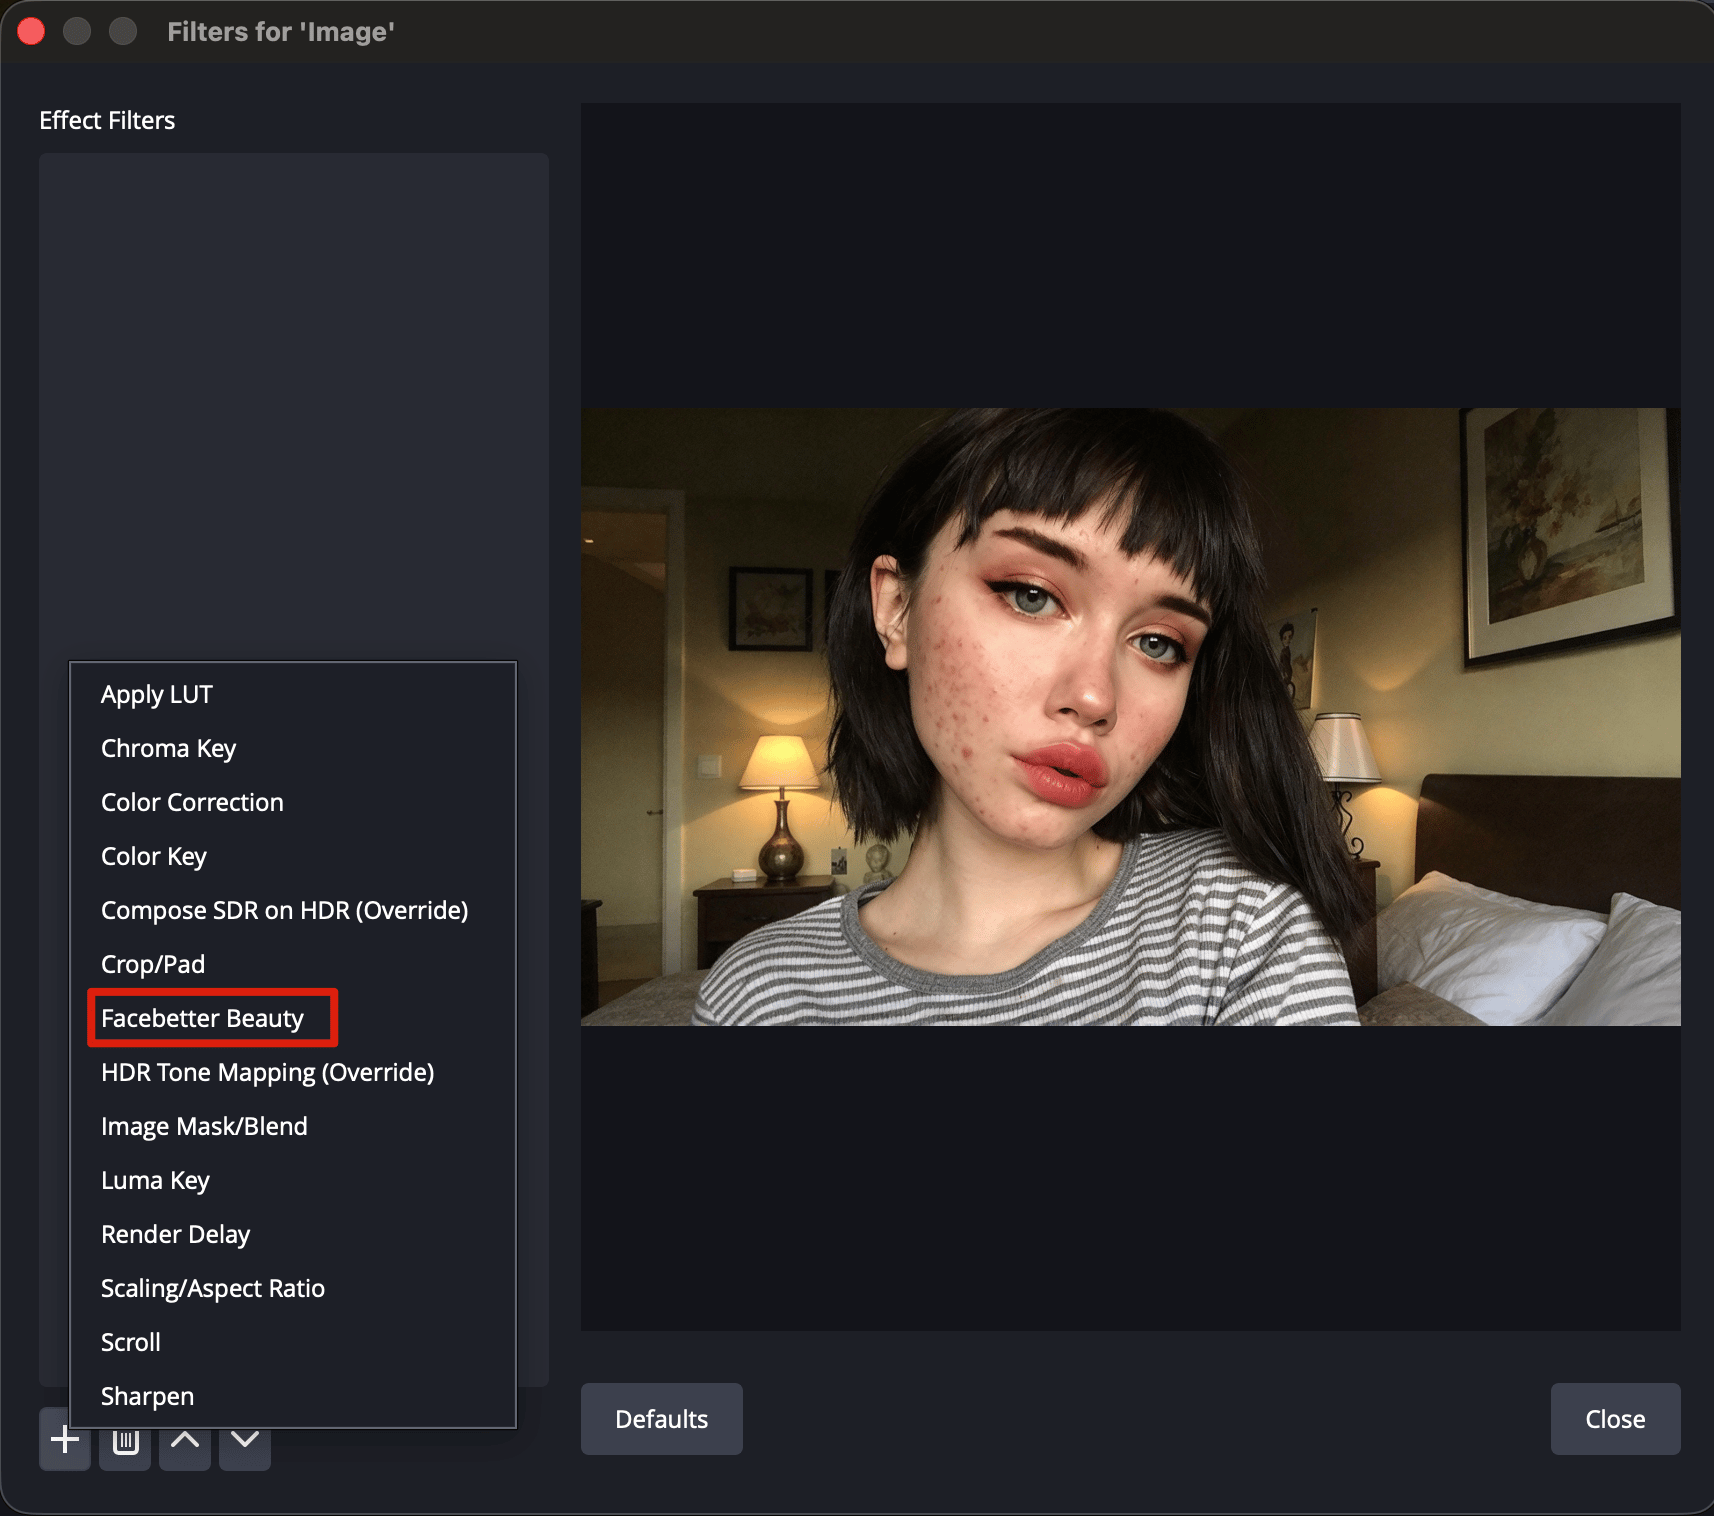
At the bottom left of the Filters window, click **+**, choose **Facebetter Beauty**, confirm the name, and close the window.
There is also a **Filters** button under the Sources list. Select the source, then click that button.
### Add Facebetter Beauty
At the bottom left of the Filters window, click **+**, choose **Facebetter Beauty**, confirm the name, and close the window.
 Two things happen:
* The Facebetter panel comes forward. To open it later, use **Tools → Facebetter**.
* The source menu at the top of the panel changes from “No filter yet” to that source, or to **All sources**. The sliders can be dragged.
The Filters window is not where you adjust the look. It has one sentence and an **Open Facebetter panel** button. Smoothing, whitening, and face shape are adjusted in the Facebetter panel on the right.
If a scene has several pictures, add the filter once on each source you want to process.
Next, drag the sliders in [Adjust effects](/obs/effects). If a slider is gray, see the [macOS FAQ](/obs/faq) or the [Windows FAQ](/obs/faq-windows).
This documentation is built and hosted on [Mintlify](https://mintlify.com), a developer documentation platform.
Two things happen:
* The Facebetter panel comes forward. To open it later, use **Tools → Facebetter**.
* The source menu at the top of the panel changes from “No filter yet” to that source, or to **All sources**. The sliders can be dragged.
The Filters window is not where you adjust the look. It has one sentence and an **Open Facebetter panel** button. Smoothing, whitening, and face shape are adjusted in the Facebetter panel on the right.
If a scene has several pictures, add the filter once on each source you want to process.
Next, drag the sliders in [Adjust effects](/obs/effects). If a slider is gray, see the [macOS FAQ](/obs/faq) or the [Windows FAQ](/obs/faq-windows).
This documentation is built and hosted on [Mintlify](https://mintlify.com), a developer documentation platform.